Run Your Own Backend (Advanced)
Only needed if you're self-hosting. The Quick Start already runs against our deployed Duo sandbox — skip this page unless you want to point the app at your own duo-server + auth-svc.
The boilerplate communicates with two backend services that work together:
duo-server— the MPC cloud node. It holds the cloud-side keyshare and participates in every keygen and signing operation.auth-svc— the auth middleware. It handles user and device registration, and authorizes every operationduo-serverperforms by responding to hook calls.
Think of it this way: duo-server is the vault. auth-svc is the doorman. The vault calls the doorman before opening for any keygen or sign request.
For full auth-svc setup instructions (Docker Compose, environment variables, and hook configuration), see the auth-svc documentation.
Self-hosting checklist
Follow this order when replacing the sandbox with your own backend:
- Run the Quick Start against the deployed sandbox first. This verifies your local React Native, Expo, iOS, and Android setup before you introduce custom backend configuration.
- Set up third-party services. Auth0 and FaceTec values must be shared by the app and
auth-svc; Google and WalletConnect values are app-only. - Configure
auth-svc, including the Auth0 API/audience, FaceTec values, database, and hook configuration. - Run
auth-svcwithduo-server, then copy theduo-serverURL and the cloud verifying key printed in theduo-serverlogs. - If your deployment runs
policy-svc, set the first policy in the admin dashboard. The seeded policy has no rules, so every signature is denied until you do. - Replace the Auth0, FaceTec, Google, and WalletConnect values in the app's
.env, then restart the app so Expo reloads.env. - Open Server settings → Custom Backend in the app and enter your backend values. The next section walks through the form.
Point the app at your backend
Use the in-app Custom Backend form. Open Server settings from the sign-in screen (or the in-app settings) and pick Custom Backend. You enter your backend values at runtime — no .env edit and no rebuild.
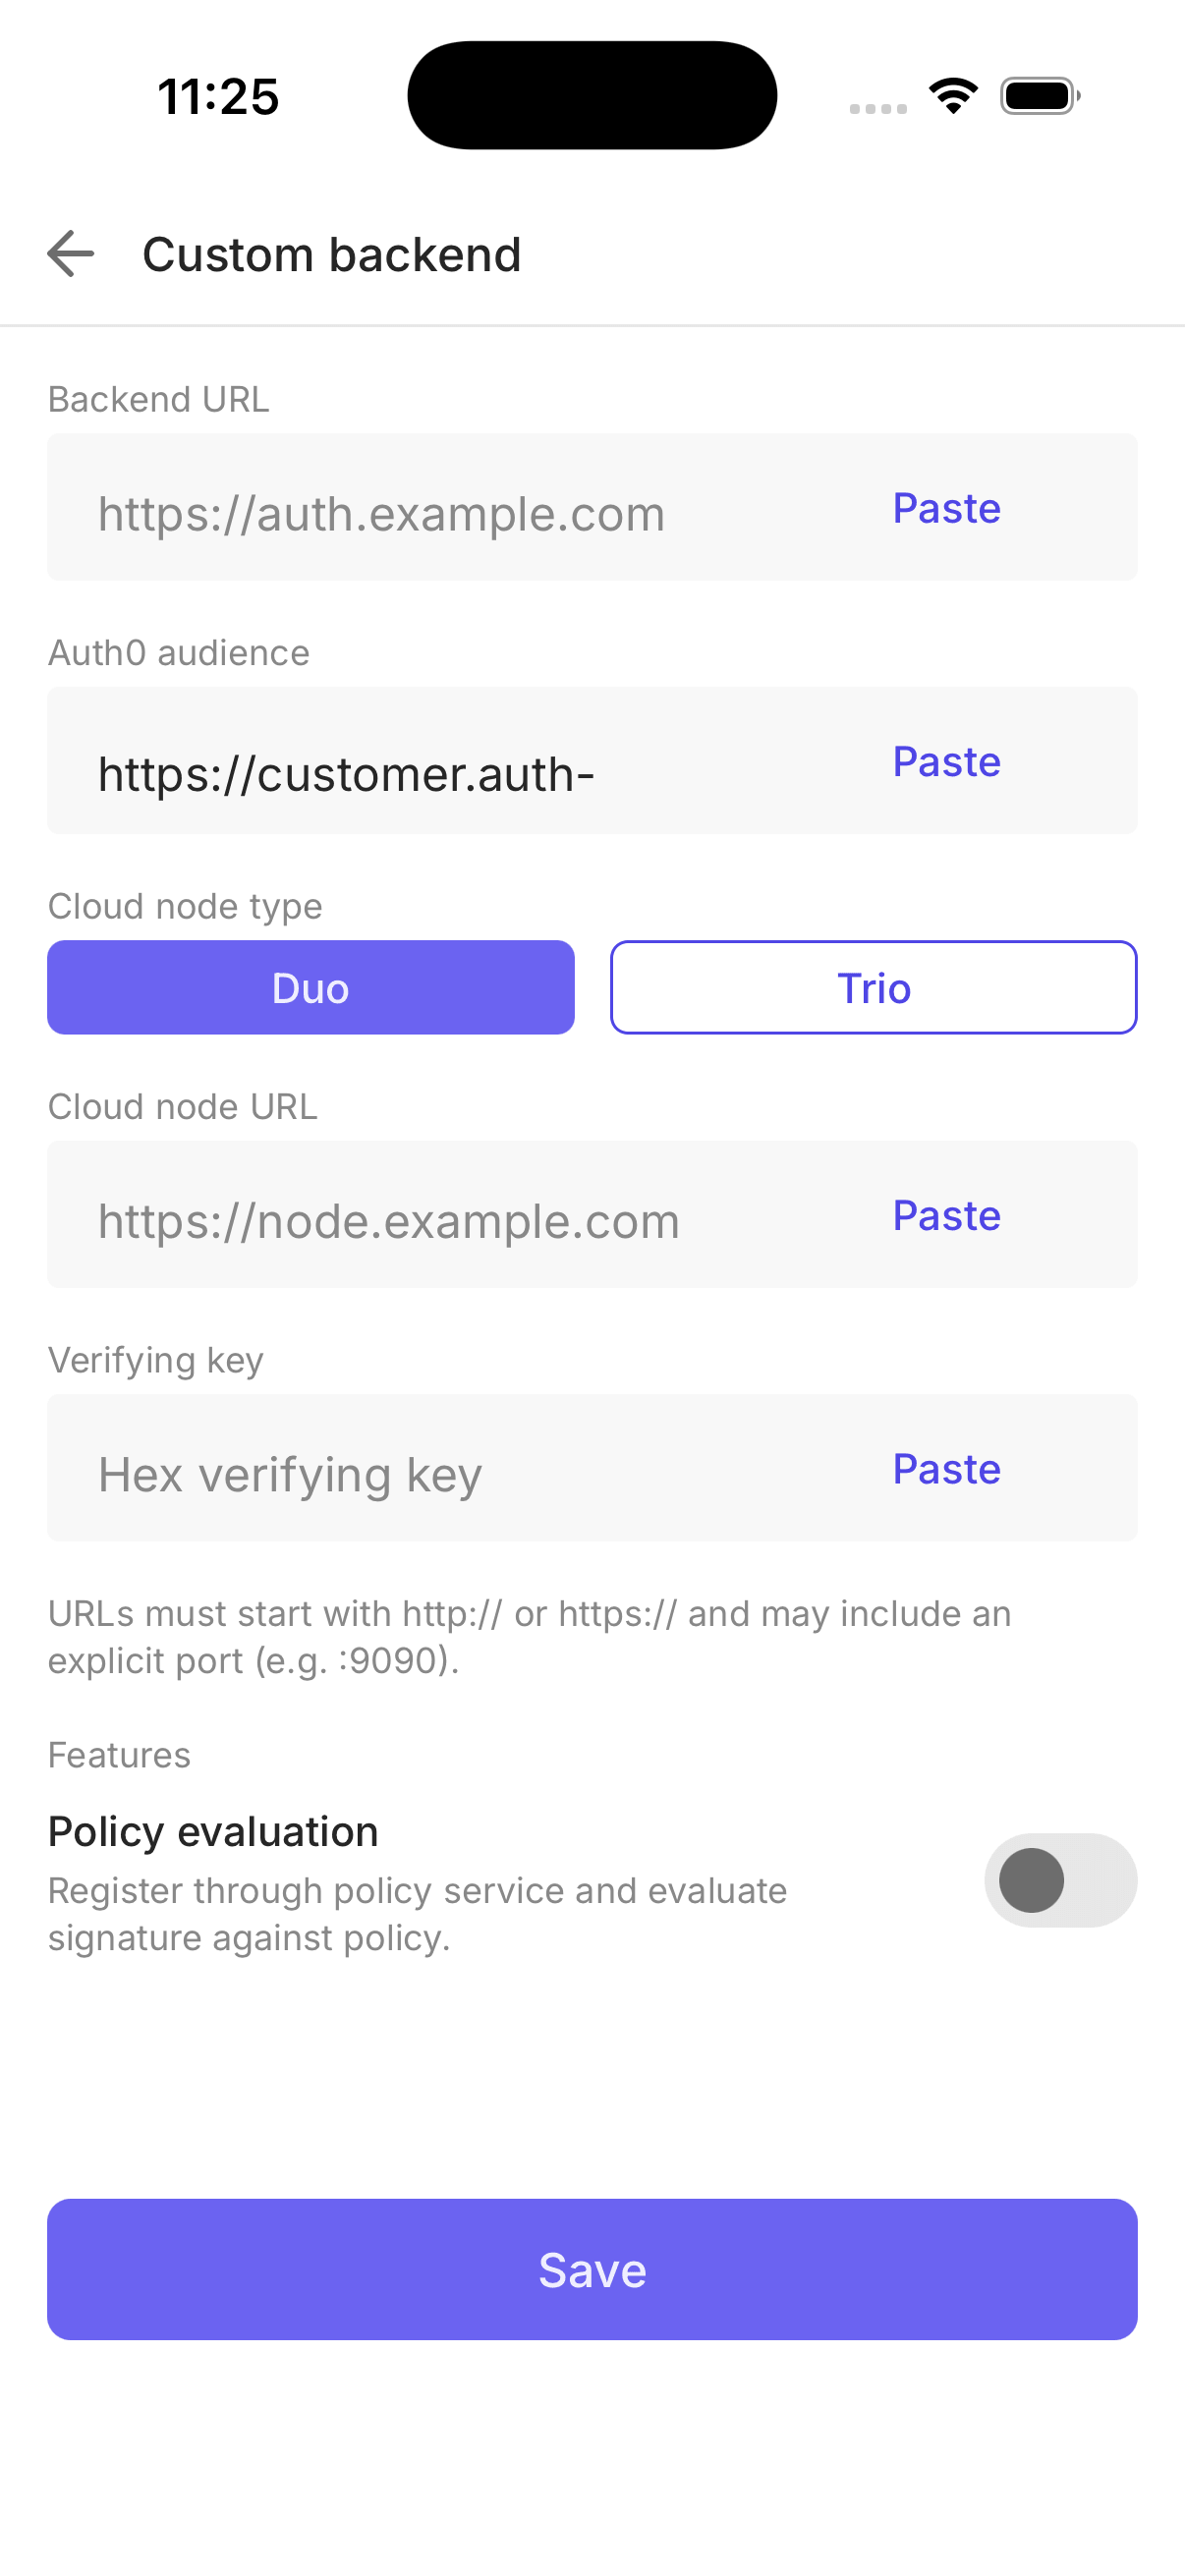
| Field | Where to find it |
|---|---|
| Backend URL | The HTTP base URL of auth-svc (e.g. https://your-auth-svc.example.com) |
| Auth0 audience | The API audience auth-svc validates tokens against — its AUTH0_AUDIENCE value. Pre-filled from EXPO_PUBLIC_AUTH0_AUDIENCE |
| Cloud node type | Duo for duo-server. Trio points at a trio-svc-first instance |
| Cloud node URL | The URL of duo-server (e.g. https://your-node.example.com) |
| Verifying key | The hex verifying key printed in duo-server logs on startup |
| Policy evaluation | Turn on only if your deployment runs the policy service. See Policy Engine |
Tap Save. The app checks that both URLs are reachable before applying the config.
Switching backends deletes the keys, wallet, and account data stored on the device. The app asks for confirmation first.
The EXPO_PUBLIC_SANDBOX_* values in .env seed the Duo Demo and Trio Demo presets. They point at the Silence Labs sandbox — leave them as shipped.
Your app config must match your auth-svc config. auth-svc validates the JWT and the FaceTec session, so the app's values have to match what auth-svc is configured with — otherwise login and backup/recovery will fail:
| App value | Must match auth-svc's |
|---|---|
EXPO_PUBLIC_AUTH0_DOMAIN, EXPO_PUBLIC_AUTH0_CLIENT_ID in .env | Auth0 tenant |
| Auth0 audience in the Custom Backend form | AUTH0_AUDIENCE |
EXPO_PUBLIC_FACETEC_DEVICE_KEY_IDENTIFIER in .env | FACETEC_DEVICE_KEY |
See Third-Party Services to create these and keep both sides in sync.
Running locally? Use these addresses depending on your target:
| Target | Backend URL |
|---|---|
| iOS Simulator | http://localhost:9090 |
| Android Emulator | http://10.0.2.2:9090 |
| Physical device | Your machine's LAN IP (e.g. http://192.168.1.x:9090) or use ngrok |
The same rule applies to the duo-server WebSocket URL — replace localhost with 10.0.2.2 or your LAN IP accordingly.